Running the WaterGAP (WGHM) Docker Container#
Prerequisites#
To run Docker images, Docker Engine (Docker) must be installed on your local machine. You can download it from Docker’s official website. The Docker documentation provides installation instructions for each supported operating system.
1) Building the Docker Image#
Using a Prebuilt Image#
If you prefer not to build the image yourself, you can download a prebuilt version from Zenodo and proceed directly to Step 2.
Note
The prebuild image is not updated regularly and is best used for using Docker functionality. Last update: 05.09.2025.
Building the Image Manually (Recommended)#
- If you want to build the image yourself, follow these steps:
Download the Dockerfile from the WaterGAP GitHub Repository.
Create a folder on your local machine (e.g: “docker_wghm”) and place the Dockerfile in it.
Open a command-line terminal and navigate to the folder where the Dockerfile is located.
To build the Docker image, run the following command:
$ docker build -t rewatergap_wghm .
This will create an image named rewatergap_wghm.
2) Running the WaterGAP Container#
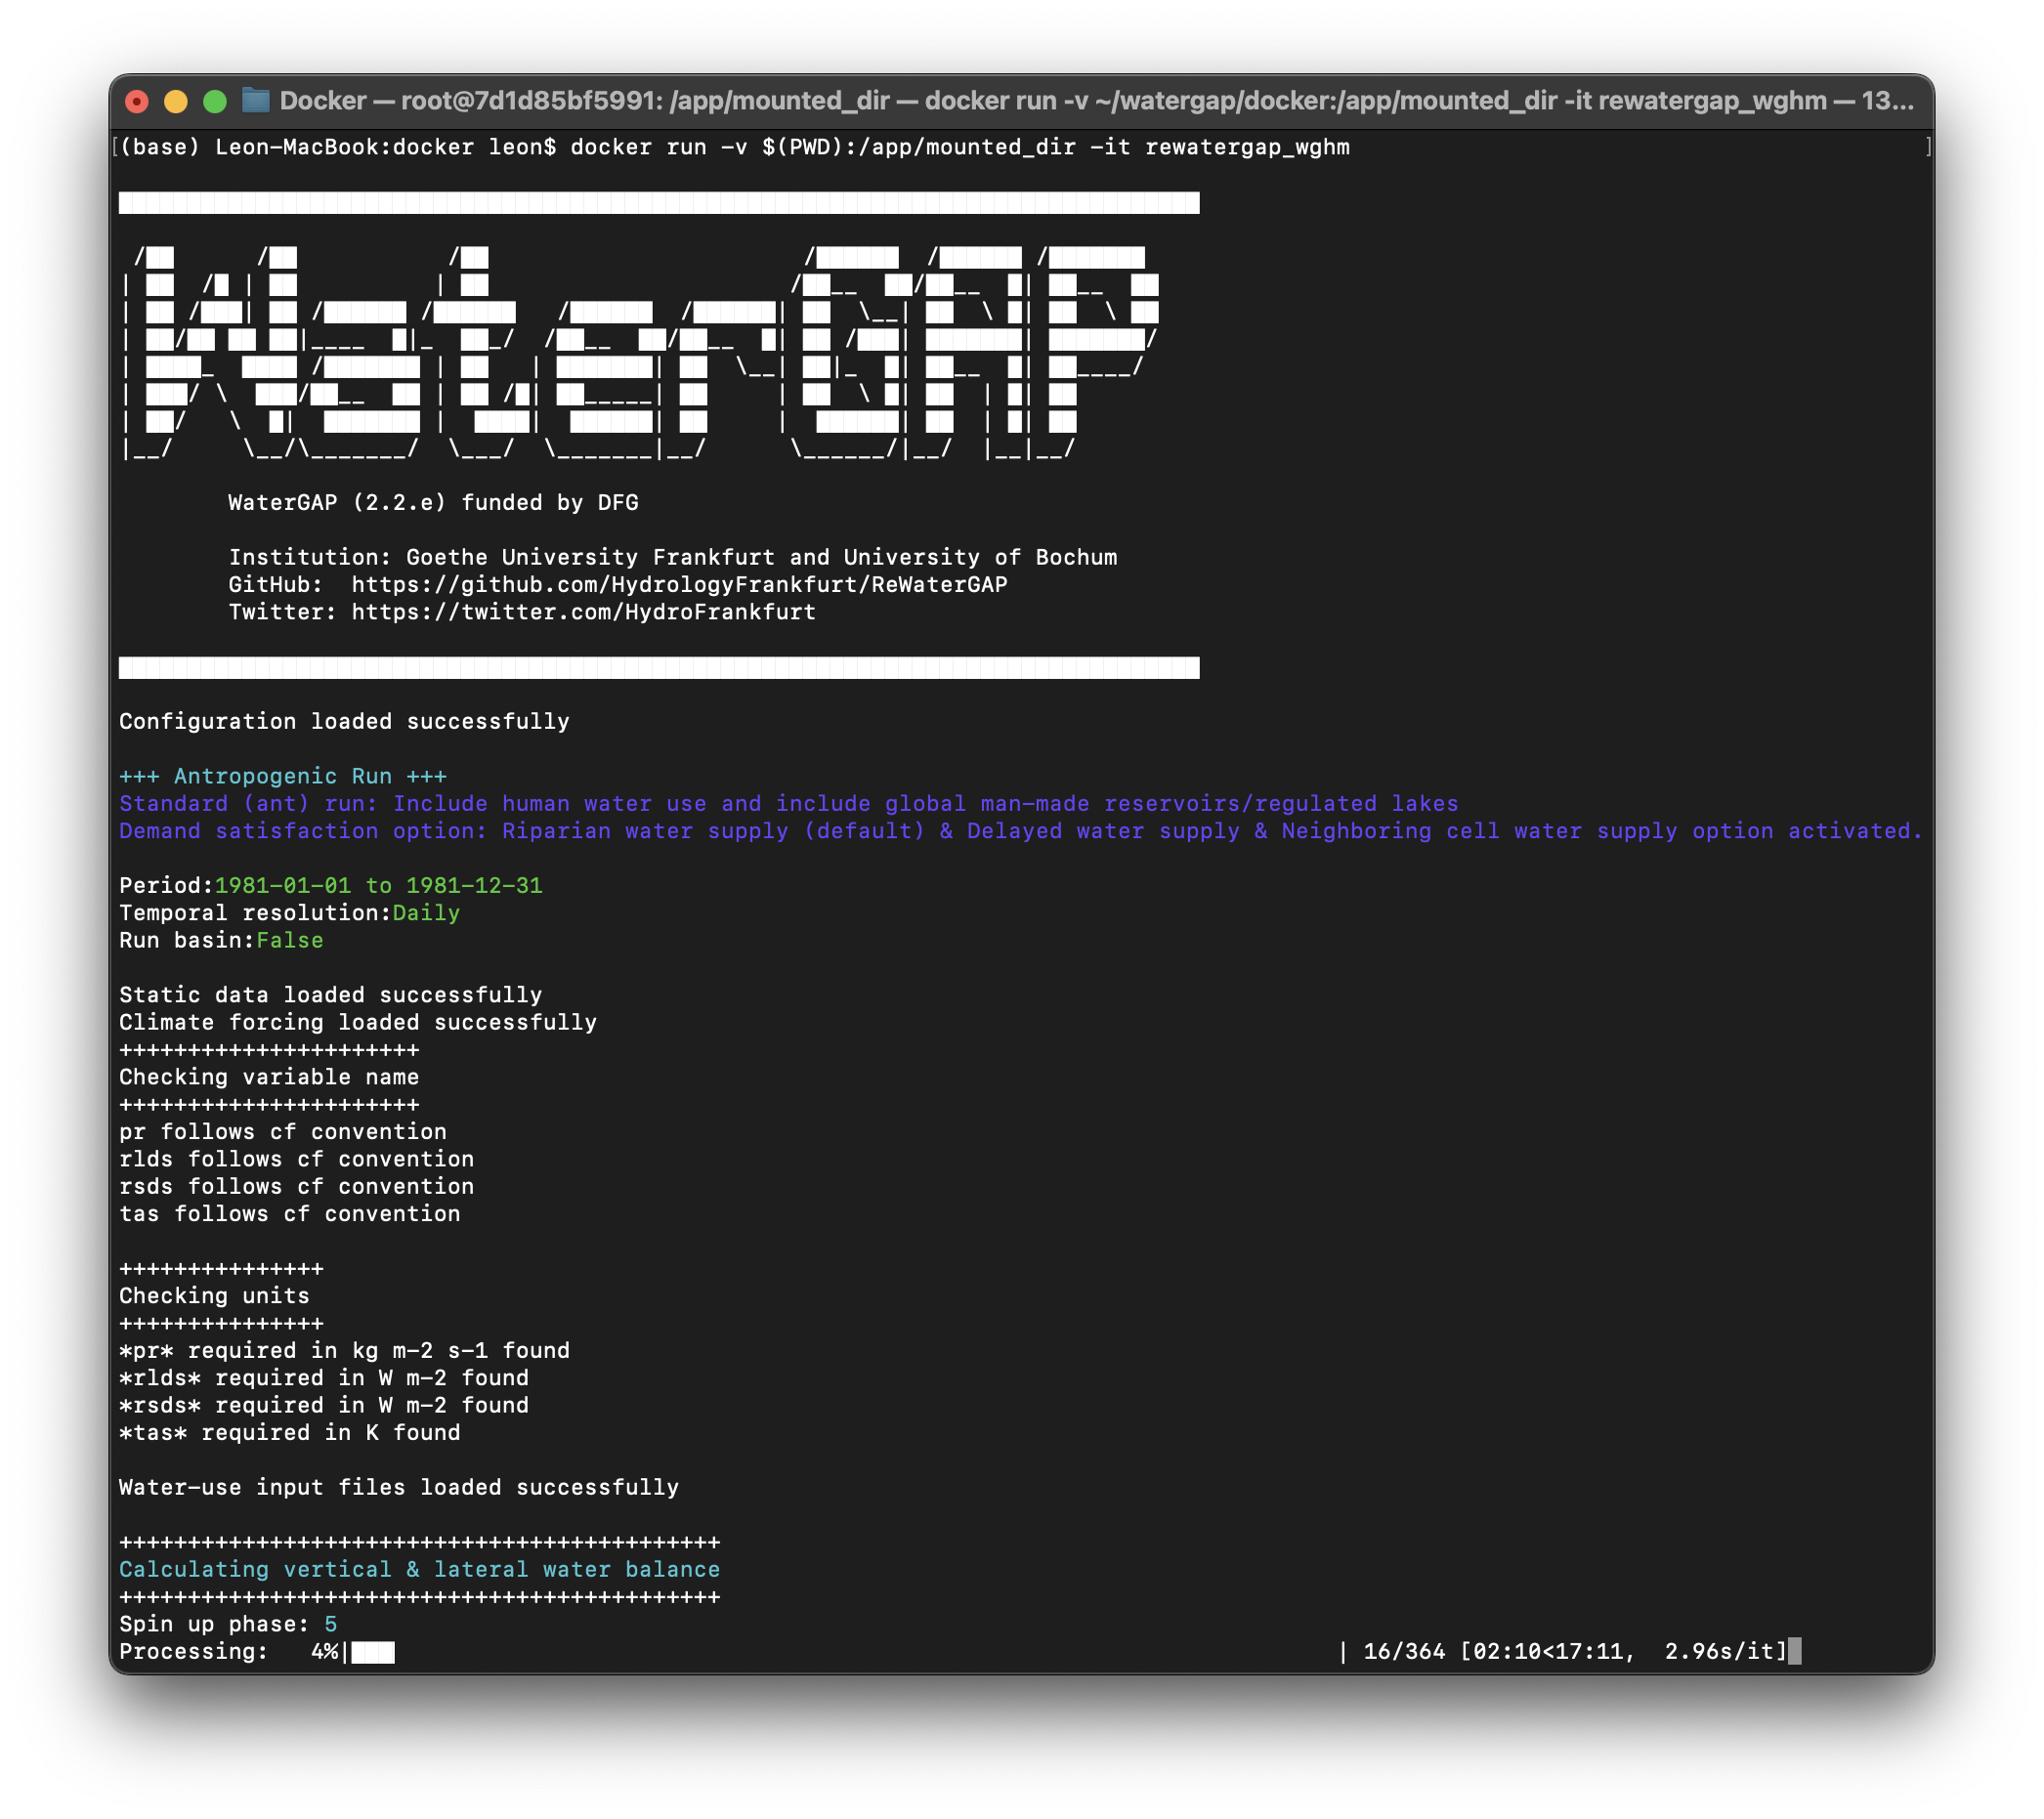
We will use a standardized run for the year 1981 as an example.
Step 1: Prepare the Working Directory#
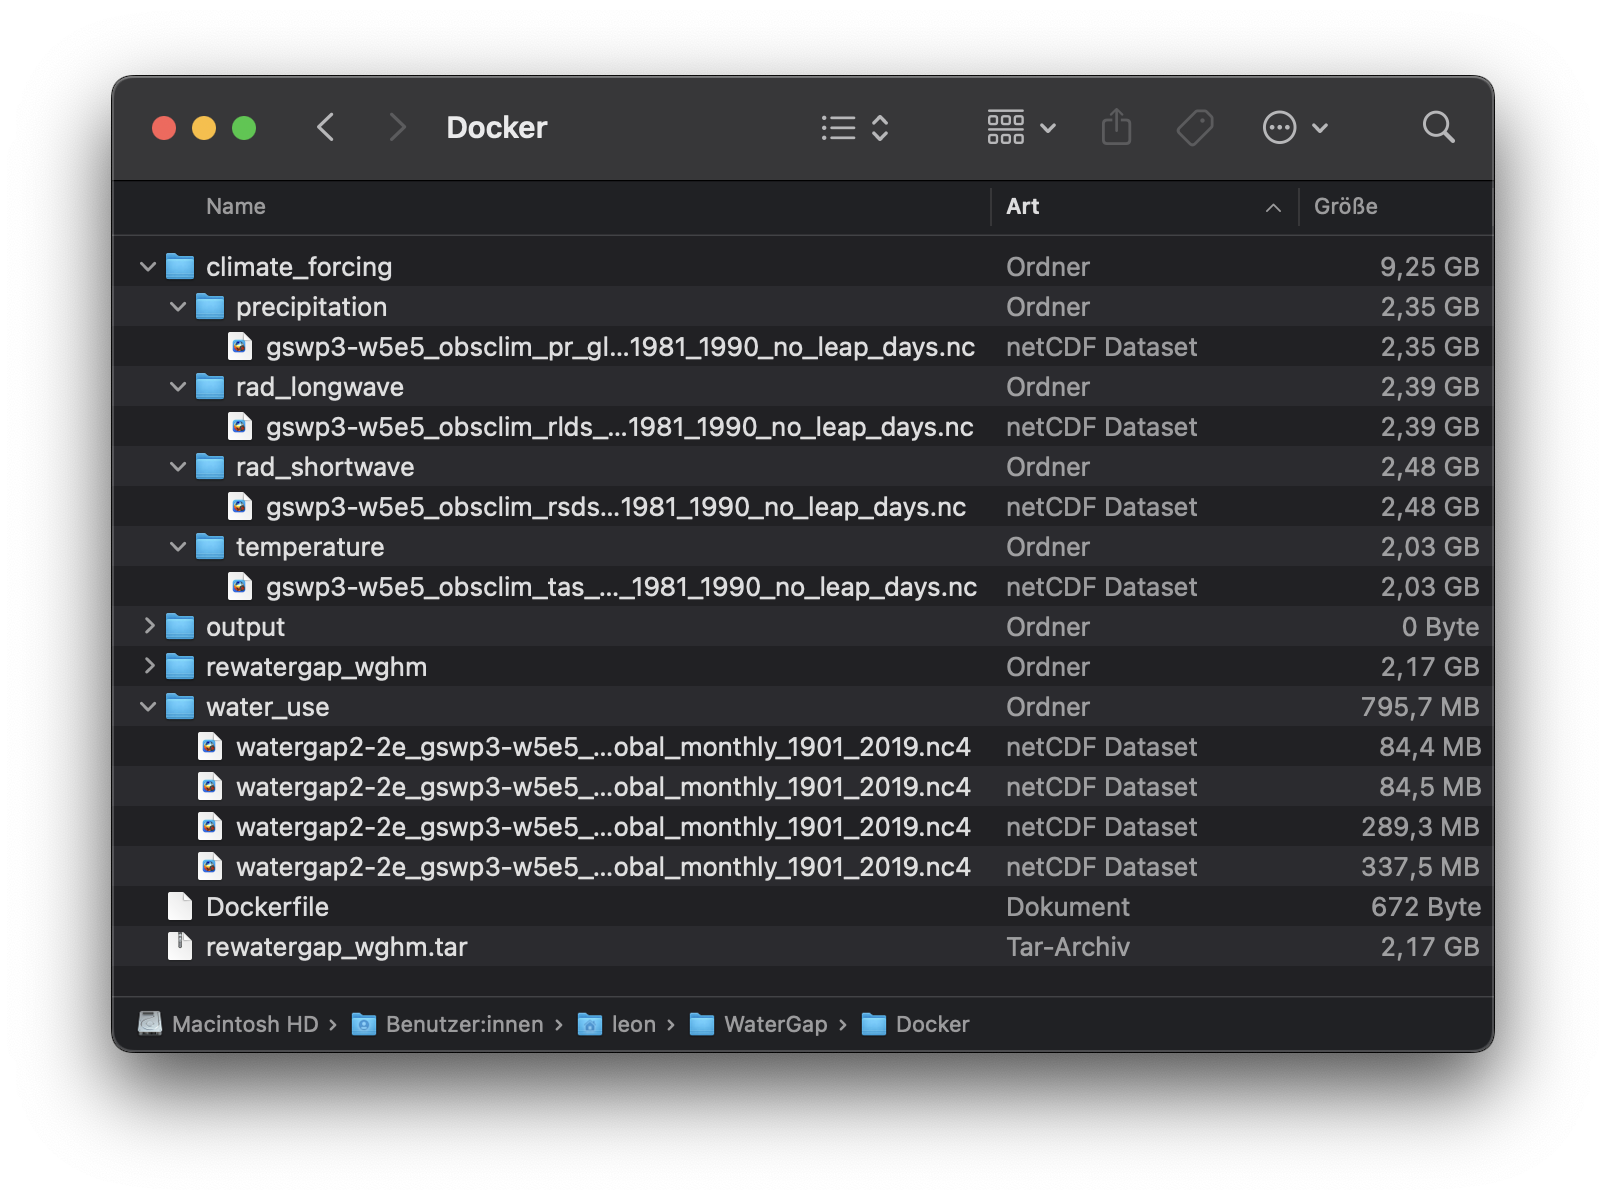
On your local PC, create a folder (e.g., docker_wghm). If you built the docker image yourself you will already have this folder. This will be your working directory.
If you downloaded the ready-built image from Zenodo, place it into the working directory folder.
Download and place the required climate forcing and water use input data into this folder. You can find more information on these datasets from our tutorial on them here.
Inside the docker_wghm folder, create an output directory to store the results.
Step 2: Load image and Mount the Working Directory to the Docker Environment#
If you’ve downloaded the image file (rewatergap_wghm.tar), in your current working directory, load the image using the command below. If you built the image yourself skip this command.
$ docker load -i rewatergap_wghm.tar
Note
Depending on your machine this step might take a while. In out case it took around 2 minutes.
To make the docker_wghm folder accessible inside the container, use the following command:
$ docker run -v $(PWD):/app/mounted_dir -it rewatergap_wghm bash
- This command:
Mounts the Docker_wghm folder to /app/mounted_dir inside the container.
Runs the container in interactive mode (-it). This makes sure, you can see what you have mounted.
Use the exit command to leave this interacitve mode after you have checked, that the right folder has been mounted.
Step 3: Configure the WaterGAP Model#
To modify the configuration file, follow these steps:
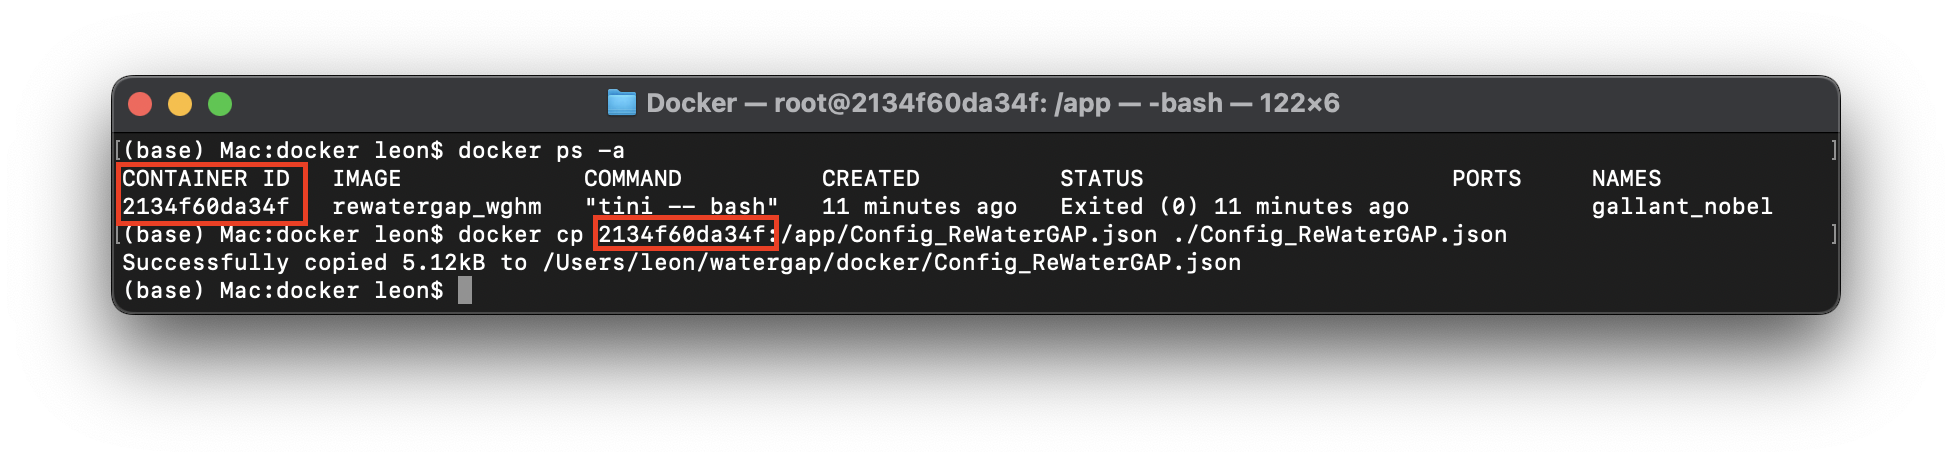
Copy the configuration file from the Docker container to your local docker_wghm folder:
$ docker cp <container_id>:/app/Config_ReWaterGAP.json ./Config_ReWaterGAP.json
Note
To find your container_id, use the following command. The requred id is also marked in the picture below.
$ docker ps -a
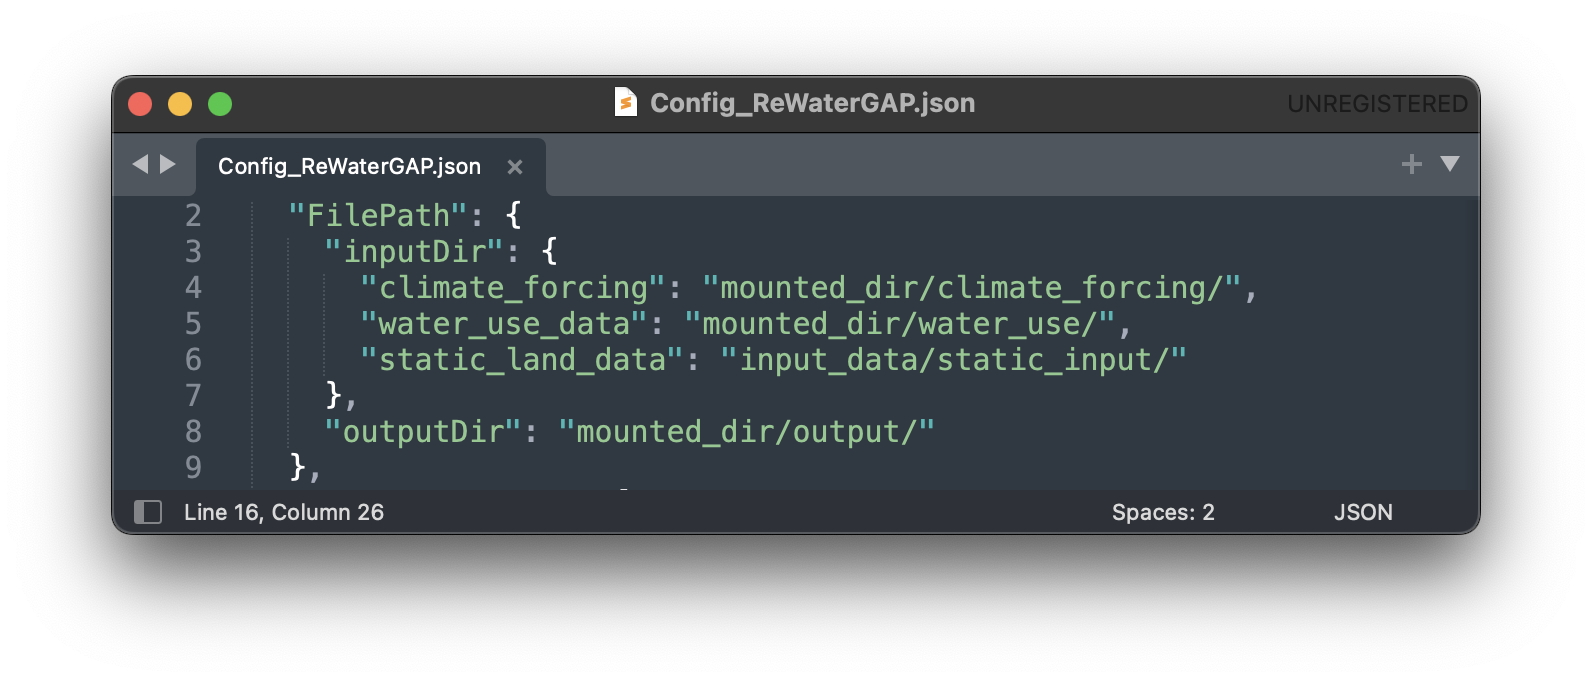
Open Config_ReWaterGAP.json in a text editor of your choice.
Update the file paths for climate forcing, water_use, and output directories. Since the directory is mounted as mounted_dir, the paths should be set as:
“climate_forcing”: “mounted_dir/climate_forcing/”,
“water_use”: “mounted_dir/water_use/”,
“output”: “mounted_dir/output/”
Update the configuration file to set it up for a standard run for the year 1981. For more information see the tutorial here.
Note
See the configuration file settings for how to run the model for other runoptions here. If your run is a restart run, make sure that your restart files are saved to “mounted_dir/output”.
Save the updated configuration file.
3) Running the WaterGAP Model#
Now that the environment is set up and the configuration file is updated, you can proceed with running the WaterGAP model inside the Docker container.
$ docker run -v $(PWD):/app/mounted_dir -it rewatergap_wghm